
The Complete Guide to Making Homemade Yogurt Without a Machine
Why Make Yogurt at Home Without a Machine?
Walk down the dairy aisle today and you’ll face a wall of yogurts: Greek, Icelandic, Australian-style, kefir-cultured, plant-based, low-fat, full-fat, flavored, unflavored, probiotic-enhanced — each with its own price tag. Premium Greek yogurts can cost $2–$4 per cup. A quart of whole milk, by contrast, costs under $2 and will yield nearly a full quart of yogurt that is richer, fresher, and more probiotic-dense than almost anything commercially available.
The idea that you need a dedicated yogurt maker to achieve this seems, on the surface, reasonable. After all, yogurt fermentation requires maintaining a specific temperature range — typically between 105°F and 115°F (40–46°C) — for an extended period, usually 6 to 12 hours. A yogurt machine just holds that temperature automatically. But here’s what most people don’t know: your kitchen already contains several items perfectly capable of doing the same job.
This guide covers everything: the microbiology behind fermentation, six distinct no-machine incubation methods, a definitive step-by-step process, milk-type comparisons, starter culture selection, troubleshooting for every possible failure mode, and flavor variations that go far beyond vanilla. By the end, you will be able to produce consistently thick, tangy, creamy yogurt every single time — no machine required, no compromise on quality.
✅ Homemade Yogurt Pros
- Saves 50–70% vs. premium store-bought
- Live cultures more potent (no shelf-life loss)
- No artificial thickeners or stabilizers
- Control fat content, sweetness, texture
- Endless flavor customization
- Zero single-use plastic packaging
- Self-sustaining: use each batch as next starter
❌ Homemade Yogurt Cons
- Requires 8–12 hours of incubation time
- Slightly more watery without straining
- Starter culture quality matters greatly
- Temperature control can be finicky at first
- Shorter fridge shelf life (2–3 weeks)
If you’re outfitting your kitchen with quality tools for fermentation and cooking, you’ll also want to explore our guide on the best Instant Pot models — the Instant Pot happens to be one of the best yogurt incubators on the planet, as we’ll discuss below.

Instant Pot Duo 7-in-1 — Best Yogurt Incubator
The Yogurt function maintains the ideal 110°F for hands-free fermentation. Perfect for beginners and power users alike.
👉 Check Price on AmazonThe Science Behind Yogurt Fermentation
Understanding what actually happens during yogurt-making transforms you from someone following a recipe to someone who understands the why — and that understanding is what lets you troubleshoot, adapt, and improvise with confidence.
What Bacteria Do
Yogurt is fundamentally a product of bacterial metabolism. Two primary species do the work: Lactobacillus delbrueckii subsp. bulgaricus and Streptococcus thermophilus. These thermophilic (heat-loving) bacteria consume lactose — the naturally occurring sugar in milk — and produce lactic acid as a byproduct. That lactic acid performs two critical functions: it gives yogurt its tangy flavor, and it causes the milk proteins (primarily casein) to coagulate, transforming liquid milk into a semi-solid gel.
The bacteria work synergistically. S. thermophilus metabolizes first at lower temperatures, producing amino acids that stimulate L. bulgaricus, which then produces lactic acid and acetaldehyde (the compound responsible for yogurt’s characteristic aroma) most efficiently at higher temperatures. Neither species does its best work alone.
Temperature: The Critical Variable
The reason temperature matters so much is that these bacteria have a very specific activity window. Below 90°F (32°C), their metabolism slows dramatically — fermentation still happens, but it takes many more hours and produces a thinner, more sour product. Above 120°F (49°C), the bacteria begin to die. Their ideal range, where activity peaks without degradation, is 105–115°F (40–46°C).
This is the entire challenge of no-machine yogurt-making: maintaining that narrow temperature window for 6–12 hours. The good news? Milk is an exceptional thermal mass. A quart of warm milk (110°F) wrapped in towels inside a cooler will stay within the active fermentation range for 8+ hours, even in a cold room. Nature is on your side.
The Role of the Pre-Heat Step
One step that confuses beginners is the initial heating of milk to 180–185°F (82–85°C) before it’s cooled and inoculated. This isn’t about pasteurization — commercial milk is already pasteurized. It serves several other purposes: it denatures whey proteins (particularly beta-lactoglobulin), which then bind to casein micelles and help create a firmer, more stable gel. It also drives off some moisture, concentrating the milk proteins. Skipping this step produces a thinner, more fragile yogurt. Doing it properly, even with ultra-pasteurized milk, significantly improves texture.
Everything You Need to Make Yogurt
One of the most liberating things about homemade yogurt is its ingredient simplicity. At its most basic, you need exactly two things: milk and a bacterial starter culture. Everything else is optional enhancement.
Whole Milk
Full-fat gives the creamiest results. 1 quart yields ~3.5 cups of yogurt.
Yogurt Starter
2–3 tbsp plain yogurt with live cultures, or a freeze-dried starter packet.
Dry Milk Powder
Optional. 2–3 tbsp per quart thickens yogurt significantly. Great for low-fat milk.
Honey or Maple Syrup
Optional flavoring added after fermentation, not before (sugar inhibits bacteria).
Vanilla Extract
Optional. 1 tsp per quart, stirred in after cooling. Pure extract only.
Gelatin (optional)
1 tsp bloomed gelatin sets yogurt firmer — useful for low-fat versions.
Starter Culture: Your Most Important Ingredient
The starter culture is the heart of your yogurt. It introduces the living bacteria that will transform milk into yogurt, and its quality determines both the flavor profile and the success rate of your fermentation. There are two main options:
Store-bought plain yogurt: Works perfectly well as a starter, as long as it clearly states “contains live and active cultures” on the label. Brands like Fage, Stonyfield, Siggi’s, and Nancy’s all work reliably. Use 2 tablespoons per quart of milk. The cultures in store-bought yogurt are viable, though with each re-culture over many generations, the culture balance can shift.
Freeze-dried starter packets: These contain a precise, balanced ratio of bacterial strains and produce highly consistent results. Brands like Cultures for Health offer heirloom-style starters that can be perpetuated indefinitely with proper technique. They’re especially valuable if you want to ensure you’re getting a specific flavor profile or if you want to make dairy-free yogurt reliably.
Equipment You Already Have (Or Need)
You don’t need to buy anything special. Here’s what you’ll use and why each item matters:
| Item | Purpose | Critical? | Substitute |
|---|---|---|---|
| Heavy-bottomed saucepan | Heating milk evenly without scorching | ✓ Yes | Any large pot |
| Instant-read thermometer | Precise temperature at each stage | ✓ Yes | Candy thermometer |
| Glass jars or bowl | Fermentation vessel — retains heat well | ✓ Yes | Ceramic crocks |
| Whisk or spoon | Mixing starter without lumps | ✓ Yes | Fork |
| Cheesecloth or nut milk bag | Straining whey for Greek yogurt | ✗ Optional | Coffee filter, thin cloth |
| Cooler / insulated bag | Passive incubation chamber | ✗ Optional | Oven, heating pad, towels |
| Ladle | Transferring milk to jars cleanly | ✗ Optional | Measuring cup with spout |
If you’re serious about fermented foods and cultured dairy in your cooking routine, a high-quality digital kitchen scale makes a significant difference in consistent results. Check our comprehensive review of the best digital kitchen scales for accurate measurement every time.
For those who cook frequently and want their milk heated quickly and evenly, a quality stand mixer bowl can double as a fermentation vessel. We cover the best stand mixers of 2026 if you’re building out your kitchen toolkit alongside this fermentation practice.

ThermoWorks Thermapen ONE — Instant-Read Thermometer
Precise to ±0.5°F in under 1 second — essential for nailing the 105–115°F fermentation sweet spot every time.
👉 Check Price on Amazon6 No-Machine Methods for Perfect Incubation
The core challenge of machine-free yogurt making is maintaining 105–115°F for 6–12 hours. These six methods each solve that problem differently, using equipment you almost certainly already own.
Oven Method
Most reliable. Uses oven’s pilot light or low setting. Best for large batches.
Cooler Method
Truly passive. Hot water + insulated cooler. Zero electricity after setup.
Instant Pot
Set-and-forget. The yogurt function is literally made for this.
Towel/Blanket
The original method. Works in warm climates or near heat sources.
Heating Pad
Precise and economical. Many pads maintain ideal temps with medium setting.
Thermos Method
Perfect for small batches. A wide-mouth thermos holds temp for 8+ hours.
Method A: The Oven Method
This is the most popular no-machine approach for a reason: ovens are large, insulated, and can be set to maintain low temperatures with minimal fuss. There are two variations depending on your oven type.
Pilot Light Oven: If your gas oven has a pilot light, the interior temperature naturally sits around 90–110°F even with the oven “off.” This is nearly perfect for fermentation. Simply place your jars in the oven, close the door, and leave them for 8–10 hours. No setting adjustment needed.
Electric or Modern Gas Oven: Preheat the oven to its lowest setting (usually 170°F) for 5 minutes, then turn it OFF completely. Place your inoculated jars inside, close the door, and do not open it. The residual heat will hold the interior at an ideal 105–115°F for 6–8 hours. For longer fermentation, you may briefly re-warm the oven (5 minutes on low) after 4–5 hours if your room is very cold.
Method B: The Cooler Method
The cooler method is arguably the most elegant no-machine approach because it requires zero electricity after setup. The physics are simple: a quality cooler is designed to maintain temperature — hot things stay hot, cold things stay cold. Fill the bottom of your cooler with hot water (around 115°F), place your sealed jars of inoculated milk inside, optionally place a towel or folded cloth on top of the jars, and close the lid for 8–10 hours.
The mass of hot water acts as a thermal reservoir, slowly releasing heat into the air around your jars and keeping the environment within the ideal fermentation range. This method works best in a warm room (above 68°F ambient). In very cold kitchens, consider adding more hot water or slightly pre-warming the cooler interior with near-boiling water before adding your fermentation jars.
Method C: The Instant Pot Method
If you own an Instant Pot or any multi-cooker with a dedicated Yogurt function, you have arguably the single best no-machine yogurt incubator in existence. The irony of course is that the Instant Pot IS a machine — but not a yogurt machine. Its yogurt mode simply maintains a precise 108°F (42°C) environment for a set duration, then beeps when it’s done. You heat the milk in the pot, cool it, add the starter, press “Yogurt,” set the timer for 8 hours, and walk away.
Read our detailed Instant Pot Duo review for a full breakdown of how the yogurt function works across different model generations. For a comparison of the Instant Pot against the slow cooker for various cooking tasks, see our Instant Pot vs. Slow Cooker comparison.
Method D: The Towel/Blanket Method
The oldest and most universal method — virtually every traditional yogurt-making culture around the world has used some version of this. After inoculating your milk and pouring it into glass jars, wrap the jars tightly in multiple layers of clean towels, then place the bundle inside a larger pot or box and cover it with another blanket or towel. The insulation traps the milk’s own heat and slows the temperature drop enough that fermentation proceeds normally.
This method works best during warm months or in a warm kitchen (above 72°F ambient). In cooler conditions, you can place the wrapped bundle inside a preheated oven (off), inside a microwave (with a cup of hot water for thermal mass), or on top of the refrigerator where the compressor generates gentle warmth. The towel method is wonderfully low-tech and surprisingly effective.
Method E: The Heating Pad Method
An electric heating pad designed for muscle pain relief makes a surprisingly excellent yogurt incubator. Set on medium, most heating pads maintain a surface temperature of approximately 105–115°F — right in the sweet spot. Place your sealed jars on the pad, drape a towel over everything to trap the rising warmth, and leave for 8–10 hours. This method gives you active, sustained heat unlike the passive methods and works beautifully in cold kitchens.
Verify your specific pad’s temperature with a thermometer before trusting it for yogurt. If it runs hot (above 115°F), try the low setting or place a folded cloth between the pad and your jars as a buffer.
Method F: The Wide-Mouth Thermos Method
For single-serving or small-batch yogurt, a wide-mouth thermos (sometimes called a food jar) is a perfect fermentation vessel. A quality thermos can maintain 110°F for 8–10 hours completely passively — no oven, no cooler, no heating pad, no power source at all. Preheat the thermos with boiling water for 5 minutes, discard the water, pour in your inoculated milk mixture, seal it, and set it aside undisturbed.
This is the perfect method for travel, camping, small apartments without reliable oven access, or anyone who wants to make a single cup of yogurt. It also allows you to use different starters in each thermos if you want to experiment with multiple culture types simultaneously.

Cultures for Health Traditional Flavor Yogurt Starter
Heirloom freeze-dried starter cultures — perpetuate indefinitely. Makes mild, creamy yogurt every batch.
👉 Find Starter Culture on AmazonStep-by-Step: The Master Homemade Yogurt Process
Now that you understand the methods, let’s walk through the complete process from milk to finished yogurt. This is the universal process that works regardless of which incubation method you choose. Each step includes an SVG diagram to visualize exactly what’s happening and what to watch for.
Pour your milk into a heavy-bottomed saucepan. Heat over medium heat, stirring frequently to prevent a skin from forming on the surface and to ensure even heating throughout the pot. You need to reach and briefly hold 180°F — use your thermometer and don’t rush this step.
At 180°F, hold for 1–2 minutes. This denatures the whey proteins, which substantially improves the texture of your finished yogurt. You’ll notice the milk beginning to steam and small bubbles forming at the edge — but don’t let it boil. Boiling causes the proteins to break down differently and can impart a cooked milk flavor.
If you’re using ultra-pasteurized (UHT) milk, some people skip this step. We recommend still doing it — the denaturation benefit applies regardless of prior pasteurization method, and UHT yogurt made without this step tends to be noticeably thinner.
Remove the pot from heat and let the milk cool. This step requires patience and attention. Your target is 105–115°F — the active range for your bacterial cultures. Adding the starter to milk that is too hot (above 120°F) will kill the bacteria. Adding it to milk that is too cool (below 95°F) will produce a thin, slow ferment that may fail entirely.
You can speed up cooling by nesting the pot in an ice bath — place the pot inside a larger bowl or your sink filled with cold water and ice cubes. Stir the milk frequently during cooling to help distribute heat evenly. With an ice bath, cooling takes about 5–10 minutes. Without, it takes 20–35 minutes depending on room temperature and milk volume.
Check temperature frequently as you approach the target range, especially if using an ice bath — it can cool quickly past the target. The ideal inoculation temperature is around 110°F (43°C).
Once your milk is at 110°F, it’s time to introduce the bacteria. Measure out 2–3 tablespoons of plain yogurt (your starter) into a small bowl. Add 2–3 tablespoons of the warm milk to the starter and whisk until completely smooth and lump-free. This “tempering” step is important — it prevents cold starter from shocking the warm milk and ensures even distribution of cultures throughout the batch.
Pour the tempered starter mixture back into the pot of warm milk. Stir gently with a whisk for about 30 seconds, using slow circular motions. You don’t want to agitate the milk vigorously at this stage — gentle mixing is sufficient to distribute the cultures evenly. Avoid using a blender or immersion blender at this stage, as excessive agitation can disrupt the initial protein network formation.
If you’re adding dry milk powder for extra thickness, this is the moment to whisk it in — add 2–3 tablespoons per quart of milk and whisk until fully dissolved and smooth.
Carefully ladle or pour the inoculated milk into your clean fermentation vessels. Glass mason jars are ideal — they retain heat well, don’t absorb flavors or odors, and allow you to see exactly what’s happening to your yogurt as it sets. Fill jars to about 1 inch from the top to allow for slight expansion.
Cover the jars with their lids (lightly, not fully sealed), a clean cloth secured with a rubber band, or plastic wrap. You want to prevent a skin from forming on the surface while still allowing a tiny bit of air circulation. Now transfer immediately to your chosen incubation environment — oven, cooler, heating pad, thermos, or Instant Pot — and begin your timer. Resist the urge to check or move the jars during incubation. Any jostling can disrupt the delicate protein gel that’s forming.
After 6–8 hours (or up to 12 hours if you want a tangier flavor), gently tilt one of your jars and observe. A properly set yogurt will pull away from the glass as a single cohesive mass — it should jiggle slightly like gelatin but not flow freely. If it’s still liquid, it needs more time. If it’s set but you want more tang, give it another 1–2 hours.
Do not stir the yogurt at this stage — stirring before refrigeration will break the gel structure and produce a thinner, more liquid consistency. Seal the jars with their lids and transfer directly to the refrigerator. Cold temperature halts fermentation and causes the yogurt to firm up further over the next 4–6 hours. For best texture, chill for at least 4 hours before eating.
Remember to set aside 2–3 tablespoons in a small labeled jar — this is your starter for next time.

Ball Wide-Mouth Mason Jars (32 oz, 12-Pack)
The gold standard for yogurt fermentation vessels. Wide mouth makes filling, cleaning, and straining easy.
👉 Check Price on AmazonMilk Types: How Your Choice Affects Every Batch
The type of milk you use has a more profound impact on your yogurt’s texture, flavor, and nutritional content than almost any other variable. Here’s a thorough comparison of all major milk options:
| Milk Type | Fat Content | Resulting Texture | Flavor Profile | Best For | Notes |
|---|---|---|---|---|---|
| Whole Milk (3.25%) | 3.25% | Rich, creamy, custard-like | Mild, buttery, slightly sweet | Best overall yogurt | Our top recommendation |
| 2% Reduced-Fat | 2% | Medium-body, slightly thinner | Slightly tangier, less rich | Lower-calorie option | Add 2 tbsp milk powder |
| Skim / Non-Fat | <0.5% | Thin, watery unless thickened | Very tangy, sharp | Liquid yogurt / lassi | Needs gelatin or powder to firm up |
| Ultra-Pasteurized (UHT) | Varies | Thinner, sometimes fails to set | Slightly “cooked” taste | Emergency substitute only | Still heat to 180°F to help |
| Raw Milk | Varies (4–6%) | Exceptional — very thick & creamy | Complex, terroir-driven, rich | Advanced fermenters | Legal restrictions vary by state |
| Goat Milk | 3.8% | Thinner than cow milk, pourable | Tangy, earthy, distinctive | Digestive sensitivity | Excellent nutrition profile |
| Oat Milk | Varies (1–3%) | Thin; requires pectin/starch to set | Mild, slightly sweet/oaty | Dairy-free yogurt | Use dairy-free starter culture |
| Coconut Milk (full-fat) | 12–18% | Thick, custardy, very rich | Tropical, naturally sweet | Dairy-free; vegan | Outstanding plant-based option |
| Cashew Milk | 2–4% | Creamy but thin | Nutty, mild, neutral | Dairy-free; blends well | Add thickener for best results |
For the absolute best texture and flavor, whole milk from a local dairy or a quality organic brand consistently outperforms any other option. The higher fat content not only enriches flavor but helps emulsify the proteins into a more stable, creamy gel. If you’re experimenting with blending, a quality blender can help incorporate milk powder or emulsifiers into alternative milks. Check our review of the best blenders under $100 if you’re building your kitchen toolkit.
Choosing and Maintaining Your Starter Culture
Your starter culture is the living heart of your yogurt. Getting this right is the difference between a consistently successful batch and a frustrating fail.
Store-Bought Yogurt as Starter
Using a small portion of high-quality commercial yogurt as your starter is perfectly effective, especially when beginning. The key criteria:
- Must state “live and active cultures” on the label — not all yogurts qualify
- Use within 1 week of opening — cultures weaken over time once exposed to air
- Plain, unflavored only — added sugars, flavors, or stabilizers can interfere
- Room temperature before use — cold starter causes temperature shock; let it sit out for 30 minutes
Brands that consistently work well: Stonyfield Plain, Fage Total, Siggi’s Plain, Nancy’s Organic, and Straus Family Creamery. Greek yogurt works well as a starter despite its thickness — the concentrated cultures are actually advantageous.
Perpetuating Your Own Starter
After your first successful batch, you can begin self-perpetuating your culture by saving 2–3 tablespoons from each batch to inoculate the next. This has several advantages: your culture adapts over time to your milk and local conditions, you develop a consistent and personal flavor profile, and you never need to buy a commercial starter again. Many fermenters have maintained the same yogurt culture through hundreds of batches spanning years.
To ensure long-term viability: keep your reserved starter in a small, sealed glass jar in the coldest part of the refrigerator (but not the freezer). Use it within 7–10 days. If you need to pause yogurt-making for more than two weeks, freeze a small portion — about 1 tablespoon — in an ice cube tray. Frozen cultures survive for months and can be thawed slowly in the refrigerator before use. The first batch after freezing may be slightly thinner as the cultures re-activate, but quality returns from the second batch onward.
Freeze-Dried Starter Cultures
For those who want maximum control and consistency, freeze-dried starter cultures from companies like Cultures for Health offer specific, balanced strain ratios that produce predictable results. These typically come in small packets — you use one packet for your first batch, then perpetuate from there. Options include mild/traditional, tangy/Greek-style, and viili (a Scandinavian ropy-style yogurt that sets at room temperature — no heat required).
If you’re interested in expanding into other fermented foods as well, see our guide on the best food processors — useful for processing fermented vegetable preparations alongside your dairy projects.
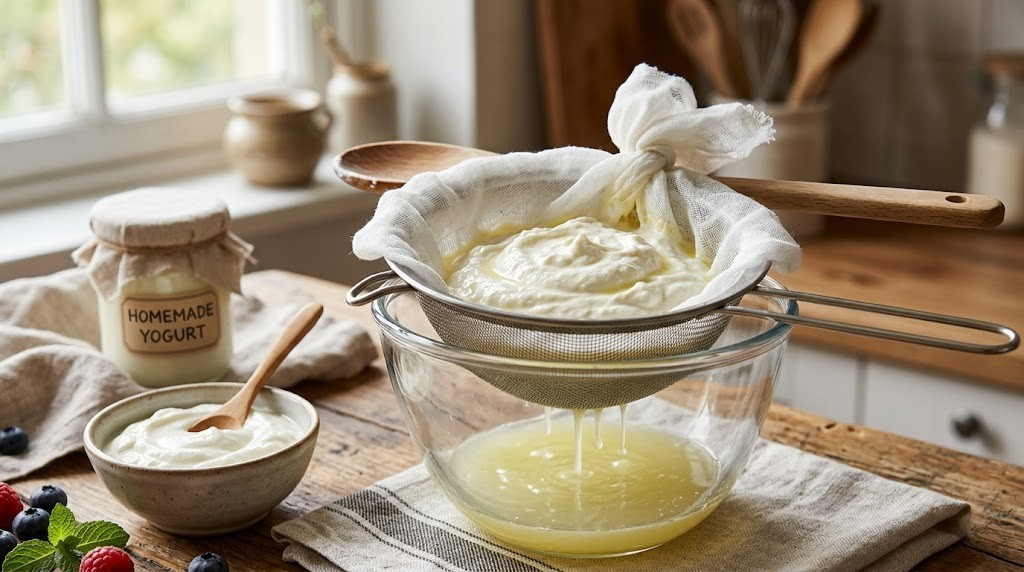
How to Make Greek Yogurt: The Straining Method
Greek yogurt is simply regular yogurt with much of its whey removed through straining. The result is thicker, creamier, higher in protein, and lower in lactose than unstrained yogurt. Making Greek yogurt at home costs a fraction of store-bought premium Greek brands, and the texture you can achieve — especially with whole milk — is extraordinary.
The Straining Process
After your yogurt has fermented and chilled for at least 4 hours (fully chilled yogurt strains more predictably than warm), set up your straining station:
- Place a fine-mesh strainer, colander lined with several layers of cheesecloth, or a dedicated yogurt strainer bag over a large bowl that fits in your refrigerator.
- Gently pour or spoon the yogurt into the strainer. Do not press or force it through — allow gravity to do the work.
- Cover loosely with plastic wrap or a plate and refrigerate while straining.
- Strain for 1–2 hours for moderately thick Greek-style, 4–6 hours for very thick Greek, or 12–24 hours for labneh (yogurt cheese — as thick as cream cheese).
- Collect and save the whey — it’s protein-rich and excellent in smoothies, baked goods, soups, and for soaking grains.
For a comparison between different types of dairy preparations and kitchen tools that help, check out our overview of the best mixing bowls for 2026 — the right bowl for your strainer setup makes the whole process cleaner and easier.

Cheesecloth Grade 90 (2 Sq Yards) — Perfect for Straining
Ultra-fine weave strains whey perfectly while holding yogurt. Reusable, food-safe, and easy to clean.
👉 Check Price on AmazonFlavoring and Variations: Beyond Plain Yogurt
Once you’ve mastered plain yogurt, the customization possibilities are genuinely exciting. Here’s the cardinal rule: add all flavorings after fermentation and chilling, never before. Sugar, honey, fruit, and extracts added to warm milk before fermentation can interfere with bacterial activity, fermentation pH, and gel formation. Always work with cold, finished yogurt.
Classic Flavor Additions
- Vanilla bean yogurt: Scrape one vanilla bean into 1 quart of finished yogurt. Mix gently. Rest in fridge 2 hours before serving for flavor to bloom.
- Honey & cinnamon: Drizzle 2 tbsp raw honey, add ½ tsp ground cinnamon. Stir before serving — don’t stir into the whole batch unless you’ll eat it within 2 days.
- Lemon yogurt: Zest of 1 lemon + 1 tbsp lemon juice per cup. A touch of honey balances the added tartness beautifully.
- Strawberry swirl: Macerate 1 cup sliced strawberries with 1 tbsp sugar for 30 minutes. Fold gently into yogurt — don’t fully combine; leave visible ripples of fruit.
- Coffee yogurt: Dissolve 1 tsp instant espresso powder in 1 tsp warm water; cool and fold into 2 cups of yogurt with honey to taste.
- Matcha: Sift ½ tsp culinary matcha into yogurt with a little honey — beautiful color and antioxidant boost.
Savory Yogurt Applications
Plain homemade yogurt isn’t just for breakfast. It excels in savory applications that store-bought versions often can’t match, because the fresher, more complex probiotic culture produces a more interesting depth of flavor:
- Tzatziki: Thick Greek yogurt + grated cucumber + garlic + dill + lemon + olive oil
- Raita: Yogurt + diced cucumber + cumin + coriander + mint — essential with spicy dishes
- Labneh: 24-hour strained yogurt rolled in za’atar and olive oil — extraordinary
- Yogurt dressing: Whisked with tahini, garlic, and lemon for grain bowl dressings
- Marinades: The lactic acid in yogurt is a superb meat tenderizer — crucial for tandoori chicken
- Baking substitute: Replace buttermilk 1:1 in pancakes, waffles, muffins, and quick breads
If you’re interested in exploring all the dimensions of cultured dairy in cooking, including how to pair yogurt with baked goods, see our review of the best stand mixers for bread dough — bread made with yogurt as a liquid component has exceptional crumb structure.
| Flavor Direction | Key Additions (per 1 cup yogurt) | Rest Time Before Serving | Best With |
|---|---|---|---|
| Classic Vanilla | ½ tsp vanilla extract, 1 tsp honey | 30 min | Granola, berries, peaches |
| Honey Cinnamon | 2 tsp honey, ¼ tsp cinnamon | 15 min | Walnuts, apples, figs |
| Lemon Zest | ½ tsp lemon zest, 1 tsp juice, 1 tsp honey | 2 hrs | Blueberries, thyme, cake |
| Matcha Green Tea | ¼ tsp sifted matcha, 1 tsp honey | 20 min | Mango, black sesame |
| Mixed Berry | 3 tbsp mashed berries, 1 tsp sugar | 1 hr | Chia seeds, coconut |
| Cardamom Rose | ⅛ tsp cardamom, 2 drops rose water, honey | 2 hrs | Pistachios, dates |
Troubleshooting Guide: Fixing Every Yogurt Problem
Even experienced fermenters encounter issues occasionally. Here’s a comprehensive guide to diagnosing and solving every common problem:
| Problem | Most Likely Cause | How to Fix Next Batch |
|---|---|---|
| Yogurt won’t set / still liquid | Too hot when starter added (killed cultures); starter culture too old; incubation temp too low | Check temp carefully at inoculation (110°F); use fresh starter; verify incubation environment |
| Very thin / watery texture | Skim milk; skipped heating step; UHT milk; insufficient time | Use whole milk; heat to 180°F; add 2 tbsp dry milk powder; extend incubation by 2 hrs |
| Grainy or lumpy texture | Milk scorched; heated too fast; starter not fully dissolved before adding | Heat milk slowly, stir constantly; temper starter in warm milk before adding |
| Too sour / overly tangy | Incubated too long; incubation temp too high; too much starter used | Reduce time by 1–2 hours; check temp of incubation environment; use 2 tbsp starter only |
| Not tangy enough / bland | Incubated too briefly; incubation temp too low; starter culture too mild | Extend incubation; verify temp is 105°F+; try a tangier commercial starter (e.g., Bulgarian-style) |
| Separated whey on surface | Normal — called syneresis. More common in low-fat milk. | Simply stir back in or pour off if you prefer drier yogurt. Not a failure. |
| Skin on surface | Exposed to air during fermentation | Cover jars before incubating; remove skin before stirring if undesirable |
| Pink, orange, or unusual color | Contamination — discard immediately | Sanitize all equipment; use fresh starter from unopened commercial yogurt |
| Stringy / ropy texture | Exopolysaccharide-producing strains (common in viili or some cultures) | This is normal for certain culture types. Start with fresh commercial yogurt starter if unwanted. |
| Fermentation too slow (still liquid at 10+ hrs) | Starter culture depleted; antibiotics in milk inhibiting bacteria | Switch to organic milk; use fresh freeze-dried starter |
The Most Common Mistake: Temperature Errors
By far the most frequent cause of yogurt failure is temperature mismanagement. There are two critical temperature moments: the inoculation temperature (when starter is added to milk — must be 105–115°F) and the incubation temperature (must maintain 105–115°F for the duration). A reliable thermometer is not optional — it’s the single most important tool in your yogurt-making kit.
For those cooking in smaller apartments or unusual spaces where maintaining temp is tricky, see our complete comparison of best small appliances for small spaces for setup ideas that maximize kitchen efficiency without crowding your counter.
Nutrition, Health Benefits, and Why Homemade Is Better
Yogurt’s health benefits have been the subject of extensive research over the past three decades. The findings consistently support what traditional cultures knew empirically: fermented dairy is exceptionally good for human health. Homemade yogurt, in particular, offers advantages that commercial products cannot match.
Nutritional Profile (Per Cup, Whole Milk Yogurt)
Why Homemade Outperforms Store-Bought
Probiotic potency: Commercial yogurt is manufactured, transported, and sits on a shelf for days to weeks before purchase. During this time, the live bacterial count declines. Homemade yogurt consumed within a day or two of fermentation has substantially higher viable probiotic counts — often 10–100x higher than aged commercial products.
No additives: Read the label of most commercial flavored yogurts and you’ll find modified corn starch, pectin, locust bean gum, carrageenan, artificial flavors, high-fructose corn syrup, and various preservatives. Homemade yogurt contains: milk and bacterial cultures. That’s it.
Lower lactose: During fermentation, the bacteria consume lactose (milk sugar). A properly fermented yogurt — especially one fermented 10–12 hours — has significantly lower lactose content than fresh milk. Many people who are lactose-intolerant can digest homemade yogurt without symptoms, particularly after a long fermentation. Straining to make Greek yogurt removes additional lactose with the whey.
Gut microbiome support: A diverse, thriving gut microbiome is increasingly linked to immune function, mental health, metabolic health, and even weight management. Regular consumption of live-culture yogurt — particularly varieties containing multiple bacterial strains — is one of the most evidence-supported ways to support gut microbiome diversity.
🏥 Health Pros of Homemade Yogurt
- Higher live culture count (fresher)
- No artificial stabilizers or preservatives
- Lower lactose than store-bought
- High calcium (up to 30% daily value per cup)
- Complete protein with all essential amino acids
- Contains B2 (riboflavin) and B12
- May support immune function via gut health
⚠️ Health Considerations
- High in saturated fat if whole milk used
- Natural lactose still present (lower than milk)
- Calorie-dense when full-fat
- Raw milk carries slightly higher contamination risk
- Added sweeteners cancel some health benefits
For a complete view of how fermented foods fit into a health-conscious kitchen, see our kitchen essentials guide for new homeowners — it covers how fermentation fits alongside cooking appliances in a thoughtfully designed kitchen setup.

Organic Valley Whole Dry Milk Powder — Texture Booster
2–3 tbsp per quart makes even skim-milk yogurt noticeably thicker and creamier. Game-changing for low-fat batches.
👉 Check Price on AmazonFrequently Asked Questions
You’re Ready to Make the Best Yogurt of Your Life
Making homemade yogurt without a machine is one of those rare cooking skills that seems intimidating at first and then becomes second nature almost immediately. Once you’ve successfully made your first batch — seen that satisfying gel pull away from the glass, tasted the difference that freshness makes, felt the satisfaction of a completely self-sustained culture — you’ll wonder why it took you so long to start.
The key takeaways are simple: heat your milk to 180°F, cool it to 110°F, add your starter, keep it warm for 8 hours, and refrigerate. The specific method — oven, cooler, thermos, heating pad — matters far less than maintaining that core temperature window. Pick whichever method suits your schedule and kitchen, and start there. You can always try other methods later.
Save some of each batch as your next starter, experiment with straining times and milk types, and gradually develop the batch of yogurt that’s completely, uniquely yours. No machine required — just milk, cultures, warmth, time, and the knowledge that you’re doing something millions of home cooks have done for thousands of years, with better technique than any of them had access to.
Explore the Best Kitchen Tools →
Complete Yogurt-Making Starter Bundle
Thermometer + wide-mouth jars + cheesecloth + starter culture — everything you need for your first batch, sourced from one place.
👉 Shop Yogurt-Making Essentials on Amazon


