Sharpen vs Hone — Know the Difference First
Sharpening removes metal to create a new edge — done every 2–3 months. Honing realigns the existing edge — done before every use with a honing rod. Most home cooks who think their knives need sharpening actually just need honing. 5 passes per side on a honing rod before each use and you’ll sharpen far less often. For a genuinely new edge: 10–15 minutes on a whetstone.
- 1.Sharpening vs Honing — The Crucial Difference
- 2.How to Test If Your Knife Needs Sharpening
- 3.All 4 Sharpening Methods Compared
- 4.The Right Angle for Every Knife Type
- 5.How to Sharpen with a Whetstone (6 Steps)
- 6.How to Use a Pull-Through Sharpener
- 7.How to Use an Electric Sharpener
- 8.How to Use a Honing Rod (Daily Maintenance)
- 9.Sharpening by Knife Type
- 10.Do’s and Don’ts
- 11.Frequently Asked Questions
Sharpening vs Honing — The Crucial Difference
Sharpening physically removes metal from the blade to create a new cutting edge. Because metal is removed, sharpening should be done sparingly — only when the knife genuinely won’t cut properly anymore. For most home cooks, proper sharpening is needed every 2–4 months.
Honing removes no metal. It realigns the microscopic teeth on the cutting edge that fold over during normal use. A honing rod straightens them back. This is why professional chefs run their knives over a honing rod before every service — they’re not sharpening, they’re maintaining alignment. Done correctly before every use, honing keeps a knife cutting like it was just sharpened, for months.
Five passes per side on a honing rod before every cook. Takes 20 seconds. Extends the time between sharpenings from weeks to months.
How to Test If Your Knife Needs Sharpening
Try honing first — if the knife cuts well after honing, you don’t need to sharpen. If still dull, use these tests:
All 4 Sharpening Methods Compared
Each method produces different results, requires different skill, and suits different knives:
The Right Angle for Every Knife Type
Sharpening angle is the single most important variable. Using the wrong angle on a Japanese knife can permanently damage the blade geometry:
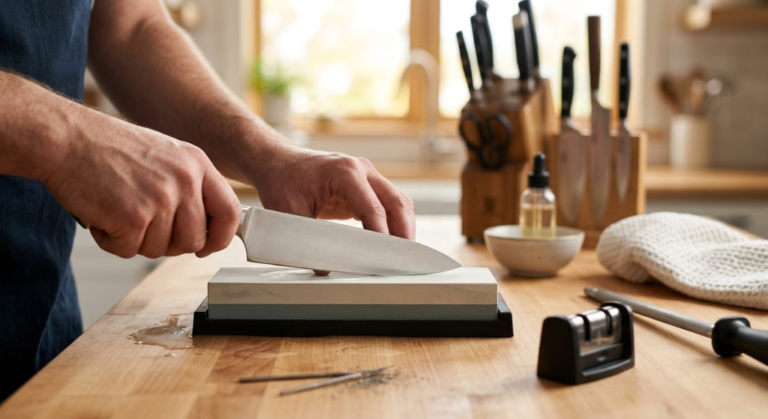
How to Sharpen with a Whetstone (Best Results)
The whetstone method produces the finest edge of any home sharpening method. You’ll need a 1000 grit stone for sharpening + 3000–6000 grit for finishing. Most quality whetstones are water stones — soak for 5–10 minutes before use and keep wet throughout.
How to Use a Pull-Through Sharpener
Pull-through sharpeners have preset angles built into V-shaped slots — angle management is automatic. The trade-off is they remove more metal per sharpening than a whetstone.
Step-by-Step for Pull-Through Sharpeners
- Start in the coarse slot — only if the knife is genuinely dull. For a touch-up, skip straight to the fine slot.
- Pull the blade through with light pressure — heel to tip in one smooth motion. Let the knife’s weight provide the pressure. Repeat 3–5 times.
- Move to the fine slot — 3–5 pulls to refine and polish the edge.
- Use the honing slot if present — 2–3 pulls to align the final edge.
- Wash the blade — metal particles will be on the knife. Rinse before using.
The coarse slot removes a significant amount of metal each use. For regular maintenance after initial sharpening, use only the fine or honing slot. Weekly coarse-slot use will shorten blade life significantly over years.
How to Use an Electric Sharpener
Electric sharpeners use motorised abrasive wheels at preset angles. Quality models produce an excellent edge with minimal skill — the machine does the angle work for you.
Using an Electric Sharpener Correctly
- Check compatibility — do not use on single-bevel Japanese knives (yanagiba, deba) — they will ruin the asymmetric grind.
- Start in the coarsest stage — only for genuinely dull knives.
- Draw blade through with light pressure — let the machine work. Pull heel to tip in one smooth stroke.
- Repeat 3–5 times per stage, then move to the finer stage.
- Wash the knife before use — electric sharpeners produce metal filings on the blade.
How to Use a Honing Rod (Daily Maintenance)
The honing rod is the most important tool for day-to-day knife maintenance. Thirty seconds before you start cooking, every time, keeps knives at their sharpest and dramatically extends time between full sharpenings.
Two Techniques
Stationary rod method (recommended for beginners): Hold rod tip-down on a cutting board. Place heel of blade near top of rod at 15–20° angle. Draw blade downward toward you — heel to tip. Repeat 5–6 times per side, alternating.
Moving rod method (the chef technique): Sweep the knife downward across a horizontally-held rod, edge-leading, heel to tip. Harder to maintain consistent angle — the stationary method produces better results for most home cooks.
Choosing the Right Honing Rod
- Steel honing rod: The standard. For most Western kitchen knives. Removes no metal, purely realigns.
- Ceramic honing rod: Slightly abrasive — removes a tiny amount of metal while honing. Good for knives that dull quickly.
- Diamond rod: An abrasive tool, not just a honer. For very dull knives between sharpening sessions.
- Japanese knives: Use only ceramic or leather strop. Steel rods are too aggressive and can chip the edge.
Sharpening by Knife Type
Different knives require different approaches. Using the wrong method damages blades that took significant skill and expense to manufacture.
← Scroll to see all columns →| Knife Type | Angle | Best Method | Avoid | Frequency |
|---|---|---|---|---|
| Western chef’s knife | 15–20° | Whetstone, electric, pull-through | Nothing specific | Every 2–3 months |
| Japanese gyuto / santoku | 10–15° | Whetstone only | Pull-through, electric | Every 3–4 months |
| Single-bevel (yanagiba) | Single bevel | Whetstone, flat side only | All pull-through & electric | Every 2–3 months |
| Serrated knife | Varies | Tapered ceramic rod | Standard stones | Yearly or less |
| Paring knife | 15–20° | Whetstone, pull-through | Nothing specific | Every 2–3 months |
| Cleaver | 20–25° | Whetstone, electric | Fine grit finish | Every 3–6 months |
Considering a new knife set? Our best knife sets for beginners covers what to buy at every price point. For the full kitchen setup, see the complete appliance buying guide.
Do’s and Don’ts of Knife Sharpening
Frequently Asked Questions
For home cooks using knives daily, a full sharpening every 2–4 months is sufficient — provided you hone regularly. With daily honing, a properly sharpened knife maintains excellent performance for 3–4 months.
A combination 1000/6000 grit water stone is ideal. Good beginner options include stones from King, Shapton, or Naniwa — widely available on Amazon for $25–$50. Avoid stones under $15 as they dish quickly and wear unevenly.
Yes, but it requires a tapered ceramic sharpening rod — work each individual serration separately. Serrated knives dull much more slowly than plain-edge knives — most home cooks only need to sharpen a bread knife once every 1–2 years.
Not bad — but aggressive. Pull-through sharpeners remove significantly more metal per session than whetstones. For everyday kitchen knives ($30–$80), this is an acceptable trade-off. For quality knives ($100–$300+), use a whetstone or electric sharpener. Never use on single-bevel Japanese knives.
Common causes: 1) Glass or ceramic cutting surfaces — use only wood or plastic. 2) Dishwasher use — handwash quality knives only. 3) Storing loose in a drawer — edges constantly knock against utensils. 4) No regular honing — the edge folds over quickly without daily honing.
Buy the honing rod first. A $20 honing rod used correctly before every session will outperform a $200 sharpener used occasionally. Once you have a honing habit established, then invest in a sharpening solution.
Check the manufacturer’s website. German/Western knives (Wüsthof, Henckels, Victorinox) are typically 15–20° per side. Japanese knives (Global, Shun, MAC) are typically 10–15° per side. If unknown, 15° is a safe choice for most kitchen knives.