20 Essential Kitchen Tools & Equipment: The Ultimate Checklist
Whether you are a novice cook or a seasoned chef, the right tools define your culinary success. We’ve curated this list based on durability, precision, and modern cooking trends.
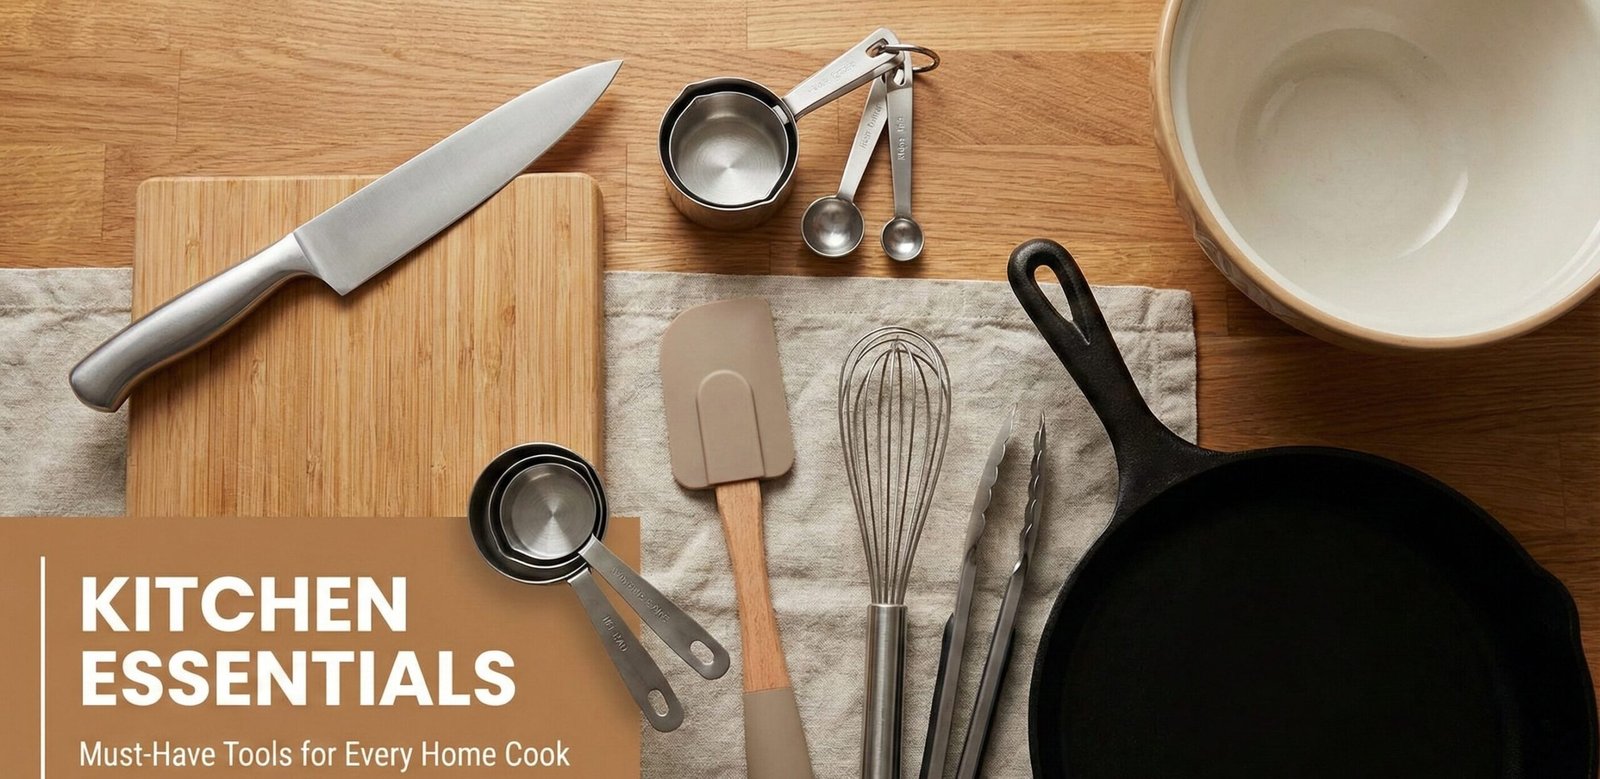
Building a functional kitchen is an investment. It is not just about buying gadgets; it is about making smart lifestyle upgrades that save you time and reduce calories. From the physics of convection cooking to the chemistry of baking, every tool on this list serves a specific, scientifically backed purpose.
📋 Quick Navigation: Categories
- Category 1: The Air Fryer Ecosystem
- Category 2: Precision & Prep
- Category 3: Heavy Machinery
- Category 4: Utilities & Safety
- Budget Tiers: What to Buy First
- Material Science: What Your Tools Are Made Of
- Care, Cleaning & Longevity Guide
- 10 Beginner Mistakes to Avoid
- Meal Prep Workflows: Putting It All Together
- Smart Kitchen Integration in 2026
- Gift Guide: Tools by Skill Level
- Frequently Asked Questions
Category 1: The Air Fryer Ecosystem
The modern kitchen centers around convection. Understanding the benefits of using an air fryer is step one; equipping it is step two.

1. High-Performance Digital Air Fryer
The cornerstone of a healthy kitchen. Unlike manual dials, a digital air fryer offers precise temperature control, which is critical for consistent results.
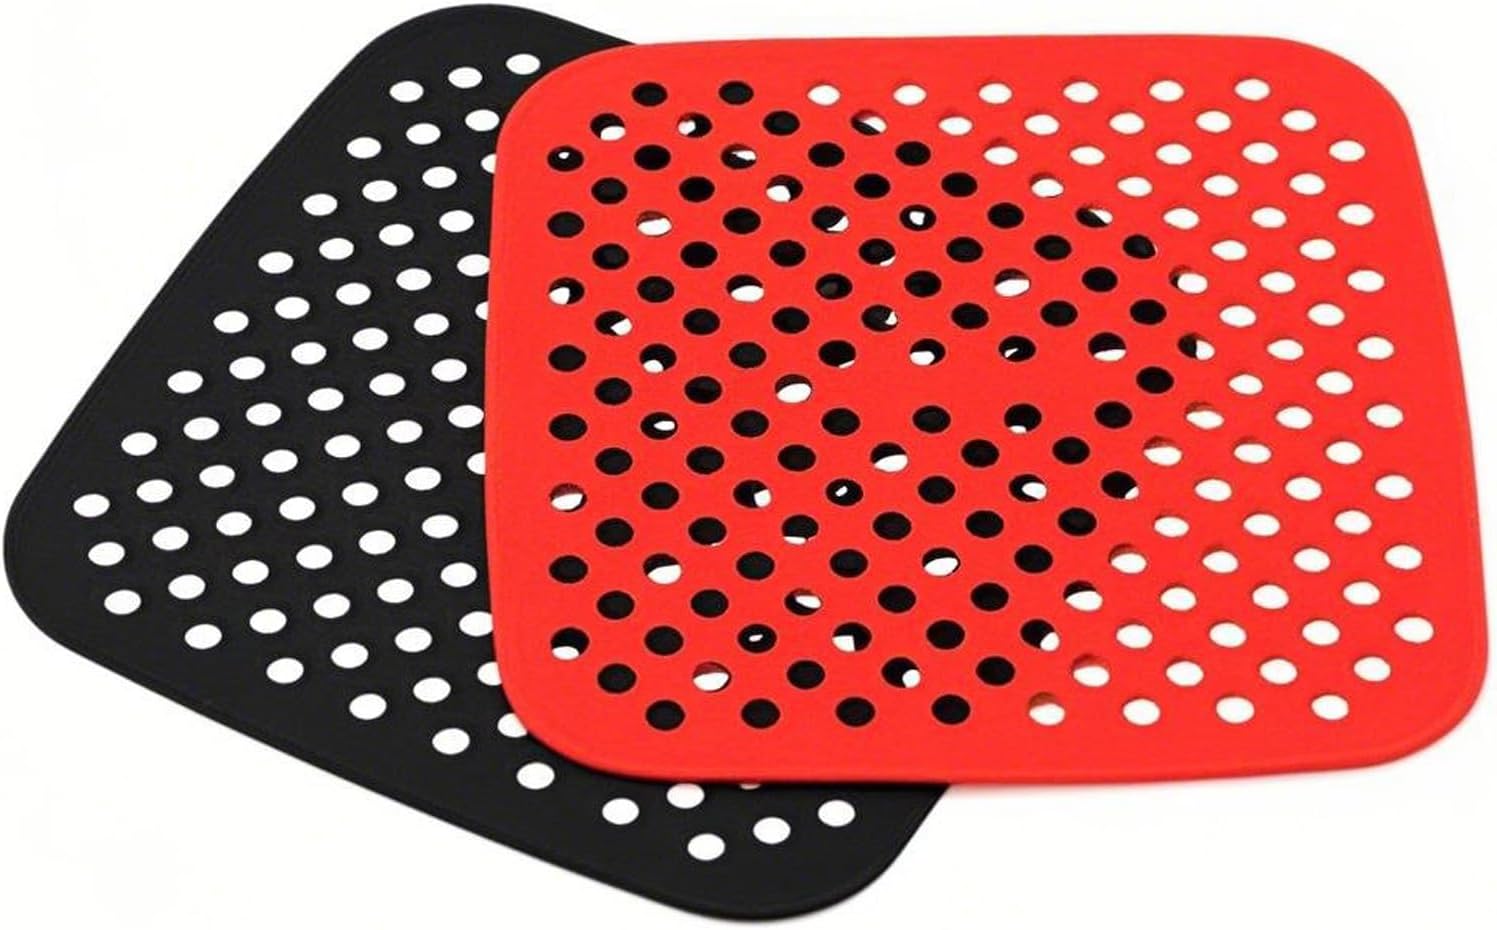
2. Reusable Silicone Liners
Protecting the non-stick coating of your basket is vital. Air fryer liners allow airflow while catching the grease, making cleanup effortless.
Disposable paper liners are okay, but silicone is the eco-friendly winner here.
Check Price
3. Precision Oil Sprayer
Never use aerosol cans (Pam) in your fryer; the propellants ruin the coating. Instead, fill a mister with high-quality oils for air frying like Avocado oil.

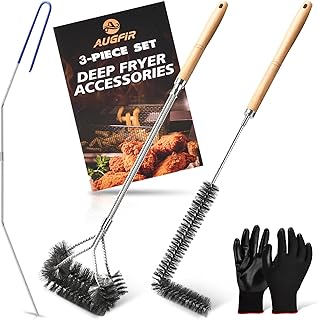
5. Deep Cleaning Kit
Baked-on grease causes smoke and bad flavors. A specialized cleaning kit with soft-bristle brushes ensures you don’t scratch the heating element.
View KitHow to Get the Most Out of Your Air Fryer Ecosystem
Owning a digital air fryer is only the beginning. The real value emerges when you treat it as the hub of a cooking system — each accessory you add expands what you can cook, how consistently you cook it, and how quickly you can clean up afterward. Many home cooks underutilize their air fryers simply because they haven’t assembled the right peripheral tools.
Think about the flow of a typical cooking session. You spray oil onto protein using your precision mister, lowering fat content by up to 85% compared to deep frying. The silicone liner catches drips so the basket stays clean. The egg molds let you run a parallel breakfast prep for egg bites while your main course cooks. Then the cleaning kit ensures the heating element doesn’t accumulate residue that leads to smoke or off-flavors in the next session. Every piece of this ecosystem feeds into the next.
If you cook for one or two people, a 4-quart basket is ideal — see our breakdown of 2 qt vs 4 qt air fryer capacity comparisons to find the right fit. For families cooking for three or more, the 6-quart range becomes the sweet spot. The 4 qt vs 6 qt wattage and energy comparison also reveals surprising differences in electricity usage between the two sizes that are worth understanding before you buy.
Advanced users eventually graduate from a standard basket air fryer to a toaster oven air fryer combo, which dramatically expands cooking surface area and introduces multi-rack cooking. These units allow you to run the top rack at one temperature for protein while the lower rack handles vegetables — a meal-prep game changer. The digital toaster oven air fryer guide covers the best units for this transition.
Category 2: Precision & Prep Tools
Cooking is art; baking is science. To master recipes—especially when understanding the difference between air fry and bake—you need precision.

6. Digital Kitchen Scale
Volume measurements (cups) are notoriously inaccurate. For baking bread or tracking macros, digital kitchen scales are non-negotiable.
Check Price
7. Nested Mixing Bowls
You need a variety of sizes for mise-en-place. The best mixing bowls are stainless steel (durable, chill-able) and have non-slip bottoms.
View Bowls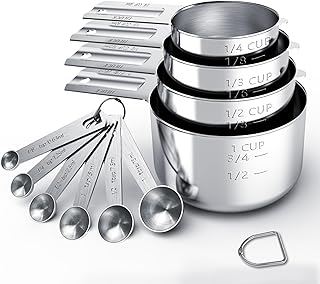
8. Stainless Measuring Cups
Plastic warps over time. Upgrade to heavy-gauge steel. See our review on the best measuring cups for durability tests.
Check Price
9. Fine Mesh Sifter
Aerating your flour is the secret to light cakes. The best sifters for baking also double as strainers for dusting powdered sugar.
View Sifter
10. Dual-Sided Measuring Spoons
Look for the best measuring spoons set that fits into narrow spice jars. Magnetic stacking sets keep your drawer organized.
Check PriceWhy Precision Tools Are the Foundation of Consistent Results
A recipe is essentially a formula. Unlike cooking, where improvisation and intuition play a meaningful role, baking is governed by ratios — the ratio of fat to flour determines crumb structure; the ratio of liquid to leavening agent determines rise. When your measuring tools are inconsistent, your results are inconsistent, and troubleshooting becomes nearly impossible because you can never recreate exactly what you did the last time.
The move from volume measurements to weight measurements is the single most impactful upgrade a home baker can make. One cup of all-purpose flour, depending on how it was scooped, can range from 120 to 170 grams — that’s a 40% variance. A digital kitchen scale eliminates that variable entirely. Every serious baker eventually makes this transition; it’s just a question of how many failed recipes it takes to get there.
✅ Stainless Steel Measuring Tools
- Dimensionally stable — never warps under heat or cold
- Dishwasher safe without degradation over time
- More accurate stamped markings than molded plastic
- Non-reactive with acidic ingredients like lemon juice or vinegar
- Last a lifetime with basic care
⚠️ Plastic Measuring Tools
- Warps over time in the dishwasher or near heat
- Markings fade with repeated washing
- Some plastics leach BPA or BPS with acidic ingredients
- Molded volume chambers are less precise than stamped ones
- Needs replacement every 2–3 years
For mixing bowls specifically, the nesting stainless steel set is the most versatile choice because stainless is both oven-safe (for warming) and refrigerator-safe (for marinating). It conducts cold efficiently, which matters when you’re making whipped cream (the bowl needs to be chilled) or tempering chocolate. Glass bowls offer visibility and microwave compatibility, but they’re heavier and break far more easily in a busy kitchen environment.
The flour sifter is often the most underrated tool in the precision category. Its primary function — aerating flour to remove clumps and break up compaction — sounds trivial but has measurable effects on cake texture, pancake fluffiness, and the even distribution of dry leavening agents through batter. Beyond baking, a fine mesh sifter functions as a strainer for rinsing small grains like quinoa, a dusting tool for powdered sugar on desserts, and even a quick sieve for removing seeds from freshly squeezed citrus juice.
Category 3: Heavy Machinery
These are the countertop workhorses. We often compare giants like Ninja Foodi vs Instant Pot, but here are the absolute essentials.
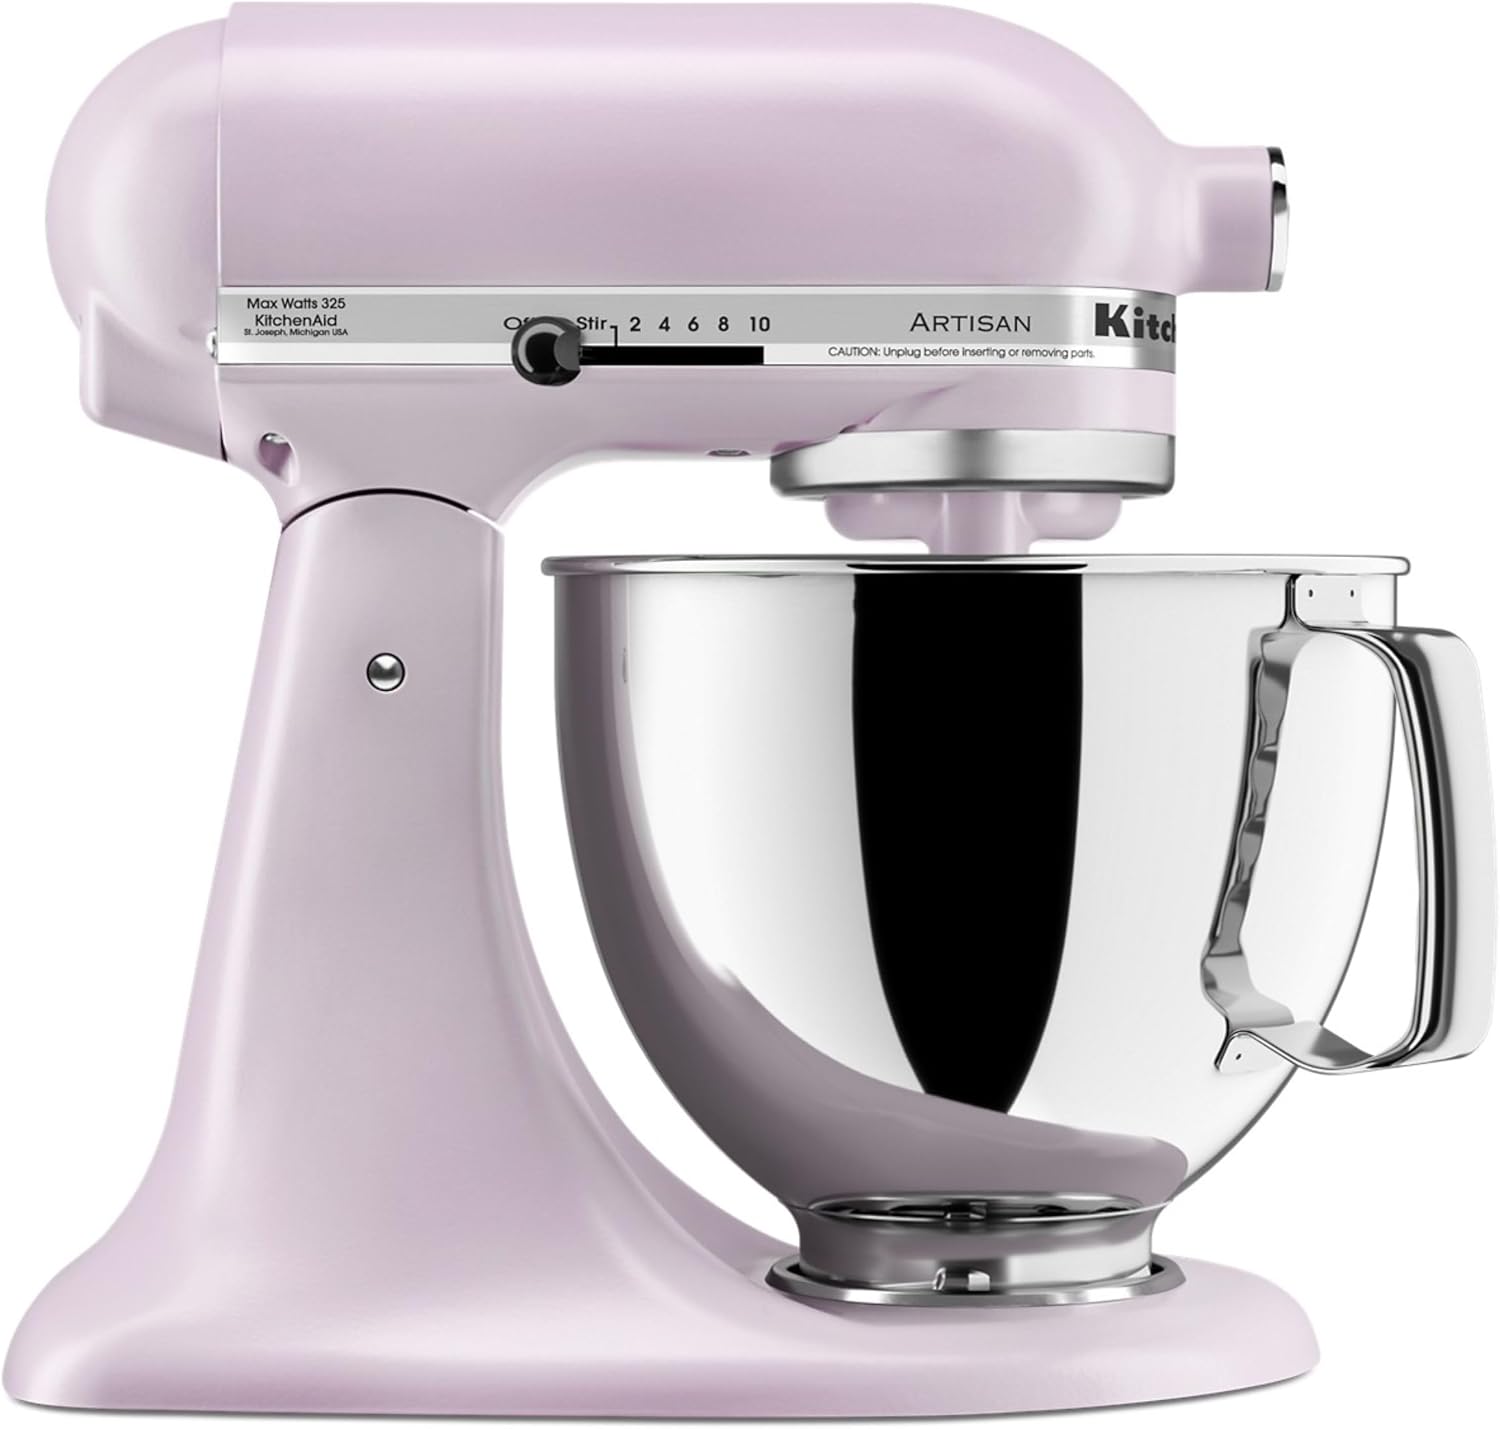
11. The Stand Mixer
The debate between the Ankarsrum vs KitchenAid is fierce, but for most home cooks, the KitchenAid Artisan remains the gold standard for versatility.
View Mixer
12. High-Speed Blender
Smoothies, soups, and nut butters require horsepower. When comparing Blendtec vs Vitamix, both excel, but Vitamix often wins on tamper control.
Check Price
13. Semi-Automatic Espresso Machine
Stop buying $6 lattes. The battle of Breville Barista Pro vs DeLonghi shows that home espresso has reached cafe quality.
View Machine
14. Electric Pressure Cooker
Speed is the game here. Whether you choose a Thomson or a Presto model, these devices tenderize tough meats in minutes, not hours.
Check Price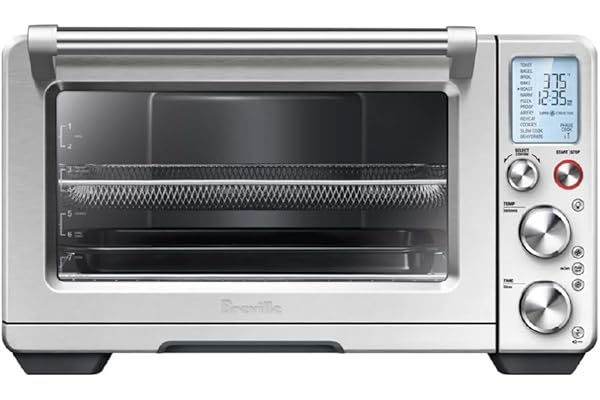
15. Smart Convection Oven
If you need more capacity, a digital toaster oven air fryer combo like the Kalorik Maxx can replace your wall oven for 90% of meals.
View OvenChoosing the Right Countertop Appliance: A Buyer’s Framework
The heavy machinery category is where most people spend the most money and where the most decision paralysis occurs. The options are numerous, the brand debates are fierce (stand mixer comparisons alone can fill entire forums), and the price range spans from $50 to over $2,000 for a single appliance. Having a clear framework for how you actually cook at home makes these decisions much simpler.
Ask yourself three questions before any major appliance purchase. First: how frequently will you use this appliance each week? If the honest answer is less than twice a week, it’s a luxury rather than an essential — budget accordingly. Second: does this appliance replace something you’re currently doing badly, slowly, or dangerously? If kneading bread by hand has been destroying your wrists, a stand mixer has an immediate, measurable payoff. Third: does your kitchen have the counter space and the electrical capacity for this appliance? Many home kitchens have only one or two circuits running to the countertop — running a high-wattage air fryer and a high-wattage pressure cooker on the same circuit can trip breakers.
Stand Mixer: When You Actually Need One vs. When You Don’t
The stand mixer is one of the most frequently gifted and least frequently used kitchen appliances in American homes. The reason is specificity: a stand mixer excels at a narrow range of tasks — bread dough kneading, meringue whipping, cookie and cake batter mixing — and does very little else. If you bake bread or make desserts at least twice a week, it pays for itself in time and physical effort within months. If you bake occasionally and your primary concern is making smoothies and weeknight dinners, the stand mixer will sit on your counter as a very expensive piece of decor.
The KitchenAid vs Ankarsrum debate is worth understanding. KitchenAid uses a planetary mixing action (the attachment orbits the bowl center) which is excellent for medium-density doughs and batters. The Ankarsrum uses a roller-and-scraper system that works outward from the center and is widely considered superior for very high-hydration bread doughs. For everyday home baking including cookies, cakes, and standard bread, the KitchenAid Artisan is still the better all-around choice.
High-Speed Blender: The Case for Investing in Horsepower
The high-speed blender category is one where the price premium for top-tier brands like Vitamix and Blendtec is genuinely justified by the output difference. A $40 blender can make a smoothie. A $500 Vitamix can make that smoothie perfectly smooth, then make hot soup from raw vegetables using only friction heat from the blades, then make almond butter, then emulsify a professional-grade sauce — all within the same 60-second window. The motor power (typically 2.0–3.5 horsepower in premium models vs. 0.5–0.75 in budget blenders) is what enables this versatility.
The practical longevity argument also holds: most budget blenders burn out within 2–3 years of daily use. A Vitamix or Blendtec comes with a 7–10 year warranty and typically outlasts the warranty by a significant margin. The math on cost-per-year of ownership often favors the premium option when calculated over a decade of use.
Category 4: Utilities, Safety & Education
The unsung heroes. These tools ensure safety and allow you to execute the best recipes for beginners.

16. 932°F Heat Resistant Gloves
Standard potholders are clumsy. Best fryer gloves allow you five-finger dexterity to grab hot baskets or rearrange racks safely.
Check Price
17. The Spider Strainer
If you do indulge in oil frying or boiling bagels, a spider is superior to a spoon. Check our list of best fryer strainers for stainless steel options.
View Tool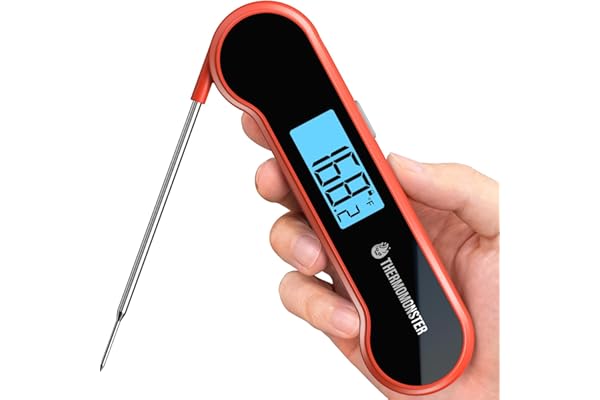
18. Instant Read Thermometer
Don’t guess. Know. Proper temperature control is the only way to ensure chicken is safe (165°F) without drying it out.
Check Price
19. 8-Inch Chef’s Knife
Before you fry, bake, or blend, you must chop. A high-carbon stainless steel knife is safer than a dull cheap one because it requires less force.
View Knife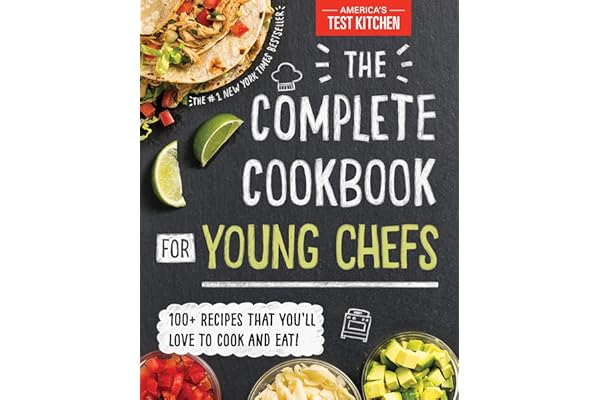
20. The Ultimate Reference Guide
Technology is great, but knowledge is power. A comprehensive best air fryer cookbook provides charts, conversion times, and inspiration when you are stuck.
Check PriceKitchen Safety: The Tools That Prevent the Most Common Accidents
The kitchen is statistically one of the most accident-prone rooms in the home. Burns, cuts, and fires account for the majority of household injuries, and the majority of those injuries are preventable with the right tools and habits. The four utility items in this category — heat-resistant gloves, spider strainer, instant-read thermometer, and a properly maintained chef’s knife — address the four most common vectors of kitchen injury directly.
Burns are the most frequent kitchen injury, and most of them happen not during intentional cooking but during the rushed moments between tasks — reaching into a hot oven without a proper grip, pulling an air fryer basket without adequate hand protection, or draining boiling water carelessly. Heat-resistant silicone gloves rated to 932°F give you full five-finger dexterity rather than the limited grip of a traditional potholder, which is what makes them genuinely safer rather than just marginally different.
The instant-read thermometer is the most important food safety tool in the kitchen after proper handwashing. The USDA safe internal temperature benchmarks are specific and non-negotiable from a food safety perspective: 165°F for poultry and reheated foods; 160°F for ground meats; 145°F for whole cuts of beef, pork, lamb, and fish (followed by a 3-minute rest). Guessing doneness by color, touch, or timing alone introduces real risk of undercooked protein, particularly in thick cuts where the exterior can appear fully cooked while the center remains well below safe temperature.
Budget Tiers: What to Buy First (and What to Save For)
Building a complete kitchen toolkit doesn’t happen all at once, and it shouldn’t. The most practical approach is a phased investment strategy: buy the highest-priority items first, use them to develop your skills, and then invest in upgrades as your cooking evolves. Here’s how to think about budget allocation across three tiers.
| Tool | Budget Pick (<$50) | Mid-Range ($50–$150) | Premium ($150+) | Priority |
|---|---|---|---|---|
| Digital Air Fryer | Dash 2.6 Qt (~$40) | COSORI Pro 5.8 Qt (~$90) | Breville Smart Oven (~$250) | 🔴 Buy First |
| Chef’s Knife | Victorinox Fibrox (~$40) | Wüsthof Classic 8″ (~$130) | Shun Premier 8″ (~$200) | 🔴 Buy First |
| Instant-Read Thermometer | Lavatools Javelin (~$25) | ThermoWorks Thermapen (~$100) | ThermoWorks ONE (~$110) | 🔴 Buy First |
| Digital Kitchen Scale | OXO Good Grips (~$30) | Escali Primo (~$35) | My Weigh KD-8000 (~$55) | 🟡 Early Investment |
| Mixing Bowls (set) | Cuisinart set (~$30) | OXO Steel 3-piece (~$55) | All-Clad Stainless (~$120) | 🟡 Early Investment |
| Measuring Cups & Spoons | OXO Plastic (~$15) | KitchenAid Steel (~$25) | Cuisipro Steel (~$40) | 🟡 Early Investment |
| Stand Mixer | Hamilton Beach (~$60) | KitchenAid Classic (~$280) | KitchenAid Artisan (~$450) | 🟢 Upgrade Later |
| High-Speed Blender | Ninja Nutri-Blend (~$45) | Ninja Professional (~$100) | Vitamix 5200 (~$450) | 🟢 Upgrade Later |
| Espresso Machine | Nespresso Essenza (~$100) | De’Longhi Stilosa (~$130) | Breville Barista Pro (~$700) | 🟢 Upgrade Later |
| Heat-Resistant Gloves | Generic silicone (~$12) | Grill Beast gloves (~$30) | Artisan grilling gloves (~$60) | 🔴 Buy First |
The “Buy First” items — air fryer, chef’s knife, thermometer, heat gloves — provide the broadest functional coverage for the lowest dollar outlay. A $40 chef’s knife that’s properly maintained will outperform a $200 knife that’s never been sharpened. Start with quality-at-price-point picks, develop your cooking habits, and upgrade when you feel a specific tool limiting you — not before.
Material Science: Understanding What Your Kitchen Tools Are Made Of
The materials your kitchen tools are made from affect performance, safety, longevity, and maintenance requirements in very different ways. This section covers the most common materials across cookware, bakeware, and appliance coatings — and explains what each choice actually means in a working kitchen.
Cookware Materials Compared
🥘 Stainless Steel
- Excellent durability and corrosion resistance
- Oven-safe to extremely high temps
- Poor heat distribution unless clad with aluminum core
- Reactive with certain acidic foods without proper searing technique
- Best for: searing, deglazing, sauces, braising
🍳 Cast Iron
- Unmatched heat retention once up to temperature
- Naturally non-stick when properly seasoned
- Heats slowly and unevenly — requires pre-heating
- Reacts with acidic foods; avoid tomatoes and citrus
- Best for: searing steaks, cornbread, frying, camping
🥗 Carbon Steel
- Lighter than cast iron with similar heat properties
- Builds non-stick seasoning faster than cast iron
- Responsive to temperature changes (unlike cast iron)
- Requires seasoning; will rust if not maintained
- Best for: wok cooking, crêpes, sautéing, eggs
🫕 Non-Stick (PTFE)
- Effortless release and minimal oil required
- Fragile coating — cannot use metal utensils
- Safe at normal temps; avoid exceeding 500°F
- Needs replacing every 3–5 years
- Best for: eggs, delicate fish, pancakes
🏺 Ceramic
- PTFE-free and marketed as safer at high temps
- Non-stick surface degrades faster than PTFE
- More brittle — chips if dropped or thermally shocked
- Cannot tolerate sudden temp changes
- Best for: low-medium heat sautéing, sauces
🥄 Copper
- Best heat conductivity of any cookware material
- Extremely responsive — heats and cools quickly
- Reactive — requires tin or stainless lining
- Very expensive and requires regular polishing
- Best for: candy making, sauces, jam, precision cooking
Air Fryer Basket Coatings: PTFE vs. Ceramic vs. Stainless
The basket coating in your air fryer is a frequently overlooked but critically important detail. Most standard air fryers use a PTFE (Teflon-family) non-stick coating, which performs well but requires careful handling to avoid scratching. Ceramic-coated baskets offer an alternative for those concerned about PTFE, though the ceramic coating tends to degrade faster with heavy use. Stainless steel baskets (found in premium models) are the most durable and are fully dishwasher-safe, but require more oil to prevent sticking. For a comprehensive breakdown of the safety and performance differences, see our analysis of ceramic vs PTFE coating in air fryers.
The Carbon Steel Wok: The Missing Tool in Most Western Kitchens
If there’s one tool consistently absent from Western kitchen checklists that professional chefs universally recommend, it’s the carbon steel wok. The wok’s design — thin walls, wide bowl, high-sloping sides — was engineered specifically for wok hei: the smoky, slightly charred flavor that’s the hallmark of restaurant-quality stir fry. A flat-bottomed carbon steel wok sits stably on a gas or electric burner, heats to high temperatures quickly, and provides the large surface area needed to keep food moving and cooking evenly.
Carbon steel also happens to be extraordinarily affordable — a quality 14-inch carbon steel wok typically costs $40–$80, less than almost any other quality cookware piece. It requires seasoning (the same process as cast iron) but develops a beautiful dark patina over time that makes it increasingly non-stick with each use. For a complete buying guide and seasoning tutorial, see our review of the 5 best carbon steel woks.
Care, Cleaning & Longevity: How to Make Your Tools Last
The best kitchen tools in the world are a poor investment if they’re not properly maintained. A $200 chef’s knife that’s never sharpened becomes a $200 liability. A $300 air fryer that accumulates months of grease buildup becomes a fire hazard. This section covers the maintenance protocols that extend tool life dramatically and protect your investment.
Air Fryer Maintenance Protocol
Your air fryer’s longevity is directly tied to how consistently you clean it. Grease and food particles that accumulate on the heating element above the basket are the primary cause of smoke during cooking, and they degrade the element’s performance over time. Ideally, the basket and drawer should be cleaned after every use (or at minimum after any session involving fatty proteins like chicken or steak). The heating element should be inspected and cleaned monthly.
- After each use: Allow to cool for 30 minutes. Remove and soak the basket and drawer in hot soapy water for 10 minutes. Wash with a non-abrasive sponge. Never use steel wool or metal scrubbers on non-stick coatings.
- Weekly deep clean: Invert the air fryer and inspect the heating element (the coiled element visible in the cavity ceiling). Use a soft-bristle brush to remove any caked residue. Never submerge the main unit.
- Monthly inspection: Check the fan area for any grease splatter that may have accumulated. Wipe with a lightly damp cloth. Inspect the power cord for any signs of damage.
- Basket re-seasoning: If you notice the basket’s non-stick coating beginning to lose effectiveness, lightly oil the interior with avocado oil and run at 375°F for 5 minutes. This re-conditions the surface.
Knife Care: Sharpening vs. Honing
These two terms are used interchangeably in casual conversation but describe entirely different processes. Honing realigns the microscopic edge of the blade without removing material — it’s what the honing steel (the rod that comes with many knife sets) does, and it should be done before every cooking session. Sharpening removes a small amount of metal from the blade to create a new, keen edge — it should be done every 3–6 months depending on use frequency.
The distinction matters because over-sharpening a knife faster shortens its useful life, while honing maintains the edge between sharpenings. Most home cooks only sharpen — and wonder why their knife feels dull a week after sharpening. The answer is almost always that they’re not honing regularly between sharpening sessions.
Stand Mixer Maintenance
The KitchenAid stand mixer is one of the most durable small appliances ever manufactured — units from the 1970s are still in regular use. But longevity requires basic care: never exceed the maximum capacity for the attachment type (bread hook doughs should not exceed 2 lbs of flour), always allow the motor to rest between large batches, and regularly check the beater-to-bowl clearance (the small gap between the beater and bowl bottom should be just enough to drag a nickel across the bowl without catching).
Cast Iron & Carbon Steel Seasoning
The seasoning on cast iron and carbon steel cookware is a polymerized layer of oil that provides the non-stick surface and protects the metal from oxidation. Every time you cook with fat in these pans, you’re reinforcing the seasoning. Avoid three things that strip seasoning: cooking highly acidic foods (tomatoes, wine-based sauces, citrus) for extended periods, using soap aggressively during cleaning, and allowing the pan to air-dry without being dried on the stove and re-oiled lightly. A well-maintained carbon steel pan or cast iron skillet will outlast every other piece of cookware you own.
10 Beginner Kitchen Mistakes (And How to Fix Them)
Every home cook makes these mistakes at some point. Identifying them early compresses what would otherwise be years of trial-and-error into a much shorter learning curve.
❌ Mistake 1: Not Preheating
Whether it’s an oven, air fryer, or skillet, adding food before the cooking surface reaches temperature causes sticking, uneven cooking, and poor searing. Always preheat. Air fryers need 2–4 minutes; ovens need 15–20 minutes to stabilize.
❌ Mistake 2: Overcrowding the Pan
Crowding drops the pan temperature dramatically, causing food to steam rather than sear. Cook in batches for proteins; give vegetables enough space that they aren’t touching. This is the single most common reason home stir-fry tastes like boiled vegetables.
❌ Mistake 3: Under-Seasoning
Professional chefs season at every stage of cooking. Most home cooks season only at the table. Season your pasta water heavily (it should taste like mild seawater), season proteins before and after cooking, and season vegetables before roasting.
❌ Mistake 4: Moving Protein Too Soon
A properly seared protein will release naturally from the pan when ready. If you’re prying or pulling, it’s not ready. Trust the Maillard reaction — when the crust forms properly, the protein releases cleanly. Forcing it tears the sear and pulls moisture out.
❌ Mistake 5: Skipping the Rest Period
Cutting into a steak, roast, or whole chicken immediately after cooking allows the juices to run out onto the cutting board. Resting allows muscle fibers to relax and juices to redistribute. As little as 5 minutes makes a visible, significant difference.
❌ Mistake 6: Using Wet Hands or Wet Proteins for Searing
Water is the enemy of the Maillard reaction. Any moisture on the surface of protein converts to steam before the surface can brown, effectively steaming the exterior instead of searing it. Always pat proteins dry before adding to a hot pan or air fryer.
❌ Mistake 7: Measuring Flour by Scooping
Scooping flour with a measuring cup compresses it significantly, leading to 20–40% more flour than the recipe intends. Use the spoon-and-level method (spoon flour into the cup, then level with a knife) or better yet, use a scale and weigh it.
❌ Mistake 8: Ignoring Internal Temperature
Color and time are unreliable indicators of doneness. A chicken breast can look fully cooked at 140°F (dangerously undercooked) and be grey and dry at 175°F (overcooked). The only reliable method is an instant-read thermometer checked in the thickest part.
❌ Mistake 9: Washing Cast Iron With Dish Soap
Modern dish soaps are much gentler than the lye-based soaps that originally earned this rule, so a small amount of soap won’t destroy seasoning. But aggressive, repeated soaping and scrubbing does strip polymerized oil layers. Rinse with hot water, use a stiff brush, dry on the stove, and apply a thin oil wipe afterward.
❌ Mistake 10: Running Air Fryer Without Preheating
Skipping the 2–4 minute preheat in an air fryer leads to inconsistent timing, uneven cooking, and poor crust development. The first blast of heat when food enters a preheated air fryer is critical — it sets the exterior immediately rather than letting the food slowly warm in a rising-temperature environment.
Meal Prep Workflows: Putting Your 20 Tools to Work
Understanding individual tools is one thing; knowing how to deploy them in a coordinated cooking workflow is where the real efficiency gains happen. Here are three practical meal prep scenarios that demonstrate how these 20 tools interact in a real kitchen session.
Scenario 1: The 60-Minute Sunday Batch Cook (Feeds 4 for the Week)
A well-organized Sunday batch cook can produce 5 full days of lunches and dinners in approximately one hour. The key is parallel processing — having multiple tools running simultaneously rather than sequentially. Here’s the workflow:
- 0:00 — Mise en place: Weigh and portion all ingredients using the digital scale and measuring cups. Chop all vegetables with the chef’s knife. This 15-minute investment eliminates the stop-start pattern that slows most home cooks.
- 0:15 — Start the pressure cooker: Load dried beans, lentils, or a tough braising cut into the electric pressure cooker. At high pressure, dried chickpeas cook in 35 minutes; a pot roast is fork-tender in 45. Set it and forget it.
- 0:18 — Preheat the air fryer: Set to 375°F for proteins (chicken thighs, salmon, shrimp) that will serve as the meal base for multiple meals this week.
- 0:20 — Load the air fryer: Season proteins using the oil mister plus spices. First batch: 18 minutes. While cooking, prep the second batch.
- 0:38 — Air fryer batch 2: Switch to roasted vegetables at 400°F for 12–15 minutes. While vegetables cook, the pressure cooker finishes.
- 0:55 — Portion and store: Use mixing bowls to portion everything into containers. Label and refrigerate. Done.
Scenario 2: The 20-Minute Weeknight Dinner
The tools that shine most on weeknights are the ones that minimize decision-making and active cooking time. The air fryer is the star here — it requires minimal monitoring, produces consistent results, and handles everything from frozen foods to fresh proteins with equal competence. A typical weeknight workflow: preheat air fryer while you make a quick salad using the chef’s knife and mixing bowl, load the protein, set the timer, check internal temperature with the thermometer at the 3-minute-before mark, and plate immediately after a brief rest.
Scenario 3: Baking Day (Bread + Dessert in Parallel)
Baking is where precision tools earn their value most clearly. A successful baking session starts with the digital scale to weigh every dry ingredient with gram-level accuracy. The stand mixer handles bread dough kneading autonomously (typically 8–10 minutes on speed 2 with the dough hook) while you use the fine mesh sifter to aerate cake flour for a separate dessert. Nested mixing bowls keep wet and dry ingredients separated until combining time. The digital thermometer confirms bread doneness (internal temperature of 195–205°F for most lean breads; 185–190°F for enriched doughs). Everything flows because every tool has a defined role and they don’t conflict with each other.
Smart Kitchen Integration in 2026: Connectivity Meets Cookware
The “smart kitchen” is no longer a futuristic concept — it’s a present reality that increasingly affects which tools are worth buying. Wi-Fi-enabled appliances, app-connected ovens, and AI-powered cooking assistants have moved from gimmick to genuine utility in the 2024–2026 product cycle. Here’s what’s actually worth paying attention to.
Which Smart Features Genuinely Add Value?
Not all “smart” kitchen features justify their price premium. Remote start and monitoring (checking whether your air fryer is done from another room) is convenient but not life-changing. App-based preset libraries (downloadable cooking programs for specific foods) are genuinely useful for beginners who want guided cooking without referring to a recipe. Automatic temperature adjustment based on internal probe readings (available in a few premium air fryer and oven models) is the most substantive smart feature available — it actually changes the cooking process rather than just adding monitoring convenience.
✅ Smart Features Worth Paying For
- Integrated meat probe with automatic shutoff
- App-based cooking library with real-time guidance
- Preheat notification so you know when the unit is ready
- Usage tracking (helps identify when appliance needs cleaning)
- Over-the-air firmware updates that add new preset programs
⚠️ Smart Features That Are Mostly Marketing
- Voice control for changing temperature (not faster than pressing a button)
- Social sharing features for your cooking results
- NFT recipe integration (yes, this was attempted)
- Subscription-locked recipes (recipes should not require ongoing payment)
- Camera inside the cooking chamber (fun, not functional)
The Food Processor: The Missing Tool
One gap in the original 20-tool list worth addressing explicitly is the food processor. A food processor occupies a specific niche between a chef’s knife (manual, slow, precise) and a high-speed blender (liquid-focused, violent, for smoothies and soups) that neither tool can fully replace. The food processor’s value is in medium-texture processing: hummus that’s creamy but not completely pureed, pastry dough that’s mixed in seconds without overworking the gluten, shredded vegetables for slaws and latkes, chopped nuts for toppings and coatings.
For kitchens that do a lot of appetizer prep, entertaining food, or Middle Eastern and Mediterranean cooking, the food processor is arguably more useful than the stand mixer. A 7–11 cup capacity covers most home cooking needs. Look for a model where the bowl, lid, and blades are all dishwasher-safe — the food processor is one appliance where cleanup friction is the primary reason people stop using it.
Kitchen Tool Gift Guide: Recommendations by Skill Level & Occasion
Kitchen tools make excellent gifts because they’re useful, last for years, and the recipient is often unlikely to invest in quality versions for themselves. The key to a good kitchen gift is matching the tool to the recipient’s actual cooking habits — an $800 stand mixer is a frustrating gift for someone who only makes microwave meals, while a $40 digital scale is life-changing for someone who bakes regularly but doesn’t own one.
🎓 For the Beginner Cook ($30–$80)
Digital kitchen scale + a good air fryer cookbook. These two items together provide the measurement precision and recipe inspiration needed to build confidence quickly. Add a set of magnetic measuring spoons for a complete beginner precision kit under $80 total.
🏠 For the New Homeowner ($100–$200)
A 5.8 Qt digital air fryer is the single highest-impact kitchen gift for someone setting up their first kitchen. It handles 70% of cooking tasks with minimal learning curve and nearly zero cleanup friction. Pair with a set of silicone liners and an oil mister for a complete starter ecosystem under $150.
🍞 For the Serious Baker ($150–$400)
KitchenAid Artisan stand mixer (when on sale) or a premium baker’s kit: professional-grade digital scale, OXO stainless mixing bowl set, fine mesh sifter, and dual-sided measuring spoons. The stand mixer is the aspirational gift; the precision kit is the practical one that will genuinely improve their baking immediately.
☕ For the Coffee Lover ($100–$700)
Entry level: a quality burr grinder ($80–$120) significantly improves any coffee setup. Mid-range: a DeLonghi semi-automatic espresso machine delivers cafe-quality results at home. Premium: the Breville Barista Pro is the gold standard semi-automatic home espresso machine and a gift that pays for itself within 90 days of daily use compared to coffee shop spending.
🎄 For the Seasoned Home Chef ($200–$500)
Upgrade their cookware with a high-quality stainless steel set or a beautifully seasoned carbon steel wok. Alternatively, a premium instant-read thermometer (ThermoWorks Thermapen) or a quality chef’s knife from a brand they wouldn’t justify buying themselves (Wüsthof, Global, or Shun). These are the tools that professionals use that home cooks often under-invest in.
🌿 For the Health-Conscious Cook ($50–$150)
The oil mister plus a high-smoke-point oil sampler pack plus a copy of an air fryer health-focused cookbook makes a thoughtful gift for someone trying to eat healthier. Combine with an air fryer cookbook focused on low-calorie, high-protein recipes and you’ve addressed both the equipment and knowledge gaps that most people face when trying to cook healthier.
Frequently Asked Questions: Kitchen Tools & Equipment
The five non-negotiable tools for a beginner cook are: a reliable 8-inch chef’s knife, a digital air fryer (4–6 qt), an instant-read meat thermometer, a digital kitchen scale, and a set of nested stainless steel mixing bowls. These five items cover the vast majority of everyday cooking tasks from protein preparation to baking with complete precision. Everything else on this list is a welcome upgrade but not a necessity until you’ve outgrown these basics.
Yes, for most home cooks. Digital air fryers offer precise temperature control (often in 5°F increments), programmable timers, preset cooking programs, and in many models, smart home connectivity. Manual (dial) air fryers are cheaper and simpler, but temperature accuracy is often poor and consistent replication of results between sessions is difficult. For anyone serious about consistent cooking results, the digital model is worth the premium — typically only $20–$40 more at entry level.
Replacement frequency varies significantly by tool type. Non-stick-coated items (air fryer baskets, non-stick pans, PTFE-coated bakeware) should be inspected annually and replaced when the coating begins visibly flaking or scratching — typically every 3–5 years with regular use. Knives never need replacement if properly maintained; they only need resharpening. Cast iron and carbon steel last multiple generations. Plastic measuring cups and spoons should be replaced every 2–3 years as they warp and the markings fade. Digital appliance motors typically last 5–10 years with basic maintenance.
Avocado oil is the top recommendation for air frying because of its neutral flavor profile and high smoke point (approximately 520°F), which comfortably exceeds the 400°F maximum most air fryers operate at. Refined olive oil (not extra-virgin, which smokes at around 375°F) is a good second choice. Avoid aerosol cooking sprays like PAM — the propellants and emulsifiers in aerosol cans can degrade non-stick coatings over time.
For most everyday cooking tasks — roasting vegetables, cooking proteins, reheating leftovers, making snacks and appetizers — yes, a 5.8–8 qt digital air fryer or toaster oven air fryer combo can handle 80–90% of what a full-size oven does, often faster and more energy-efficiently. For large items (a full 20 lb turkey, a full sheet pan of cookies, or a large casserole dish), a conventional oven is still necessary. For smaller households or studio apartments, a high-quality toaster oven air fryer combo genuinely can replace a conventional oven entirely for daily use.
Splurge on: your chef’s knife (you use it every single day and quality is immediately tangible), a high-speed blender if you make smoothies or soups regularly, and a stand mixer if you bake bread or desserts frequently. Buy budget on: measuring cups and spoons (stainless steel at any price is fine), mixing bowls (stainless steel is stainless steel), and silicone accessories like spatulas and liners where the material properties are consistent regardless of brand premium. The digital air fryer sits in the middle: a $60 budget model works, but investing in a $90–$120 model with better temperature accuracy and larger capacity pays off quickly in consistent results.
PTFE (Teflon-family) coatings become potentially problematic when they begin visibly flaking or peeling, because ingesting coating fragments — while not acutely toxic at the small amounts typically involved — is not desirable. If you see visible scratching, discoloration, or peeling in the non-stick surface of any cookware or air fryer basket, replace the item. At normal cooking temperatures below 500°F, intact PTFE coatings release no measurable harmful compounds. The primary risk is mechanical damage to the coating, not temperature exposure during normal cooking.
Conclusion: Building Your Arsenal
Equipping your kitchen with these 20 tools — and understanding why each one matters — transforms cooking from a chore into a consistent, enjoyable, and creative practice. The most important insight is that the order in which you acquire these tools matters as much as the tools themselves. Start with the highest-leverage items: a reliable small digital air fryer, a sharp chef’s knife, an instant-read thermometer, and a digital kitchen scale. These four items give you more cooking capability than most home kitchens currently have.
From there, add precision tools as your baking improves, graduate to a stand mixer when you find yourself kneading bread by hand more than twice a week, and invest in a high-speed blender when you’ve committed to a daily smoothie habit. Let your actual cooking habits drive your tool purchases rather than aspirational ones — the best kitchen is the one that matches how you actually cook today, with enough flexibility to support how you want to cook tomorrow.
Remember, the best tool is the one you actually use. Choose equipment that fits your lifestyle, counter space, and culinary ambitions. A single air fryer paired with a sharp knife and a thermometer will produce better meals in the hands of a thoughtful cook than a fully stocked professional kitchen operated without attention to technique. Tools amplify skill — they don’t replace it.
Explore our complete guides: Best Digital Air Fryers · Air Fryer Recipes for Beginners · Best Air Fryer Cookbooks · Digital vs Manual Air Fryer · Ninja Foodi vs Instant Pot